Plastering is a pivotal phase in the construction or renovation of a building, creating a smooth and even surface on walls and ceilings. This process not only enhances the structural integrity of a space but also sets the stage for the final aesthetic touches.
However, many wonder what comes next after the plastering work is complete. Understanding the following steps is crucial to achieving a flawless finish and transforming a bare, plastered wall into a canvas ready for decoration.
In this guide, we will explore the essential tasks that follow plastering, from curing and priming to painting and applying decorative elements. Whether you’re a DIY enthusiast or a professional contractor, this article will help you navigate the transition from rough plaster to a beautifully finished surface.
What Comes After Plastering?
After plastering, several steps help to complete and prepare the surface for its final appearance and use. Here’s what typically comes after plastering:
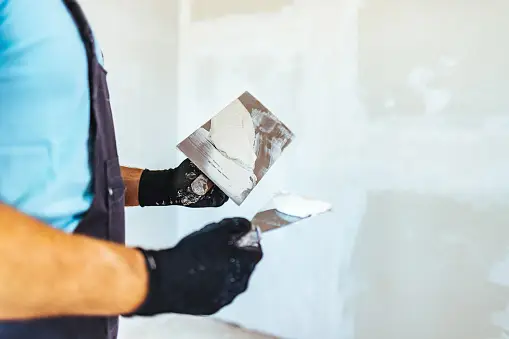
- Curing the Plaster: Allow the plaster to dry and cure completely. This process can take several days, depending on the type of plaster and environmental conditions. Proper curing ensures that the plaster sets correctly and avoids cracks or imperfections.
- Sanding and Smoothing: Once the plaster is dry, lightly sand the surface to smooth out any rough spots, bumps, or imperfections. This step is crucial for achieving a uniform surface and ensuring that subsequent layers adhere properly.
- Priming: Apply a primer to the plastered surface. Priming helps to seal the plaster, reduce absorbency, and provide a consistent base for paint or other finishes. It also ensures better adhesion of paint and reduces the risk of peeling or flaking.
- Applying a Finish: This can include painting, wallpapering, or other decorative finishes. If painting, apply a base coat, followed by one or more topcoats to achieve the desired colour and finish. If wallpapering, ensure the wall is smooth and properly primed for best results.
- Adding Decorative Elements: This might involve adding moulding, trim, or other decorative features to enhance the aesthetics of the room. These elements can add character and detail to the finished space.
- Final Touches and Inspections: Once the finish is applied and decorations are in place, do a final inspection to ensure the quality and uniformity of the work. Address any minor defects or inconsistencies to complete the job to a high standard.
These steps provide a comprehensive approach to completing the plastering process and transitioning to the final stages of construction or renovation.
What Is The Next Step After Plastering A Wall?
It is important to wait for plaster to dry and cure correctly after applying it to a wall before moving on to the next stage. To make sure the plaster sets properly and reaches its maximum strength, this curing procedure is essential. The time it takes for the plaster to dry might vary from a few days to a week or longer, depending on factors like humidity and temperature.
After the plaster has dried, you should look for surface flaws like lumps, uneven spots, or rough regions. If you softly sand the plaster, you may remove these irregularities and make the surface smooth and uniform. To prepare the wall for further treatments, it is advised to clean it after sanding to eliminate dust and debris.
After plastering the wall, the following step is to apply primer. Priming reduces the plaster’s absorbency and helps seal it, while also providing a uniform substrate for subsequent treatments like paint. Priming also makes sure that the paint or wallpaper sticks well to the surface.
Applying the finish, whether it’s painting, wallpapering, or ornamental components, is the last stage after priming and preparing the wall. Applying numerous layers of paint to get a uniform appearance or adding texture to provide a unique look are both possible outcomes of this process, which depends on the project at hand.
After plastering a wall, the most important things to do are wait for it to cure, sand it, prime it, and then apply the final finish.
What Is The Correct Order Of Construction?
The construction process involves a series of interconnected steps, each building upon the previous one to ensure a successful project. The exact order can vary depending on the type and scope of the project, but generally, construction follows this typical sequence:
- Planning and Design: This initial phase includes site assessment, architectural design, engineering, permits, and budgeting. It sets the groundwork for the entire project.
- Site Preparation and Earthworks: This step involves clearing the site, grading the land, and laying the foundation. Utilities such as water, sewage, electricity, and gas are often installed at this stage.
- Foundation Construction: The foundation is laid, which may involve concrete footings, slabs, or other types of bases depending on the structure.
- Structural Framing: The skeleton of the building is erected, which includes the construction of walls, beams, columns, and roofs.
- Roofing and Exterior Shell: The roof is constructed, and the building is enclosed with exterior walls, windows, doors, and other shell components. This step provides weatherproofing and basic insulation.
- Rough-in of Mechanical, Electrical, and Plumbing (MEP): Electrical wiring, plumbing pipes, HVAC ducts, and other utility infrastructure are installed within the building’s structure.
- Insulation and Drywall Installation: Insulation materials are added to walls, ceilings, and floors for energy efficiency, followed by the installation of drywall or other internal wall coverings.
- Interior Finishes: This stage encompasses plastering, painting, flooring, cabinetry, trim, and other interior design elements.
- Exterior Finishes: Exterior siding, brickwork, stucco, painting, and landscaping are completed, adding curb appeal and protecting the building’s exterior.
- Final Installations and Fixtures: This step involves installing fixtures such as lighting, plumbing fixtures, appliances, and final touches like baseboards and moulding.
- Testing and Inspection: Conduct thorough testing of mechanical systems, electrical systems, and other critical components. Inspection by regulatory bodies may be required to ensure compliance with codes and standards.
- Punch List and Final Touches: Address any minor issues or finishing touches identified during the inspection. This step ensures all work is completed to the required standards.
- Cleaning and Final Walkthrough: The site is cleaned, debris is removed, and a final walkthrough is conducted to ensure the project is complete and ready for occupancy.
- Project Handover and Closeout: The building is handed over to the client, and the final paperwork is completed, including warranties, manuals, and other documentation.
These steps represent the general order of construction and may vary depending on project specifics, local regulations, or unique design requirements. However, following this sequence provides a solid framework for building successful construction projects.
Conclusion
The construction process is complex and involves many moving parts that must be meticulously planned, coordinated, and carried out. The success of the project depends on each step, from the planning and preparation of the site through the final inspections and installations.
Stakeholders benefit from knowing the usual sequence of construction since it facilitates their navigation from concept to completion. Additionally, it stresses the significance of high-quality, meticulous work at every stage, from planning to completion.
A construction project can be finished on schedule, under budget, and to everyone’s satisfaction by adhering to a disciplined method and working well with contractors, architects, engineers, and inspectors. In the end, the skill, perseverance, and collaboration of all those engaged in a building project determine its successful conclusion.
Looking for more information? Click and have a peek at these guys!
Categories: Uncategorized